高级纹理
立方体纹理
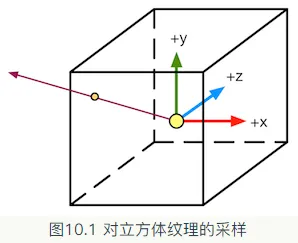
立方体纹理是环境映射的一种实现方式,和之前使用二维纹理坐标不同,对立方体纹理采样我们需要提供一个三维的纹理坐标,这个三维纹理坐标表示了我们在世界空间下的一个3D方向,这个方向矢量从立方体的中心出发,当它向外部延伸时就会和立方体的6个纹理之一发生相交,而采样得到的结果就是由该交点得来的。我们应该尽量对凸面体而不要对凹面体使用立方体纹理。(因为凹面体会反射自身)。
天空盒
天空盒是在所有不透明物体之后渲染的,而背后使用的网格是一个立方体或者是一个细分后的球体。
创建用于环境映射的立方体纹理
第一种方法是直接由一些特殊布局的纹理创建。
1 2 3 4 5 6 7 8 9 10 11 12 13 14 15 16 17 18 19 20 21 22 23 24 25 26 27 28 29 30 31 32 33 34 35 36 37 38 39 using UnityEngine;using UnityEditor;public class RenderCubemapWizard : ScriptableWizard { public Transform renderFromPosition; public Cubemap cubemap; void OnWizardUpdate () { helpString = "选择要生成立方体纹理的物体和Cubemap资源" ; isValid = (renderFromPosition != null ) && (cubemap != null ); } void OnWizardCreate () { GameObject go = new GameObject( "CubemapCamera" ); go.AddComponent<Camera>(); go.transform.position = renderFromPosition.position; go.GetComponent<Camera>().RenderToCubemap(cubemap); DestroyImmediate( go ); } [MenuItem("GameObject/Render into Cubemap" ) ] static void RenderCubemap () { ScriptableWizard.DisplayWizard<RenderCubemapWizard>( "Render cubemap" , "Render!" ); } }
反射
使用了反射效果的物体看起来像是镀了一层金属,想要模拟反射效果很简单,我们只需要通过入射光线的方向和表面法线方向来计算反射方向,再利用反射方向对立方体纹理采样即可。
1 2 3 4 5 6 7 8 9 10 11 12 13 14 15 16 17 18 19 20 21 22 23 24 25 26 27 28 29 30 31 32 33 34 35 36 37 38 39 40 41 42 43 44 45 46 47 48 49 50 51 52 53 54 55 56 57 58 59 60 61 62 63 64 65 66 67 68 69 70 71 72 73 74 75 76 77 78 79 80 81 82 83 84 85 86 87 88 Shader "Unity Shaders Book/Chapter 10 /Reflection" { Properties { _Color("Color Tint", Color) = (1 ,1 ,1 ,1 ) _ReflectColor ("Reflection Color", Color) = (1 ,1 ,1 ,1 ) _ReflectAmount ("Reflect Amount", Range(0 ,1 )) = 1 _Cubemap ("Reflection Cubemap", Cube) = "_Skybox"{} } SubShader { Tags { "RenderType"="Opaque" } Pass { CGPROGRAM #pragma vertex vert #pragma fragment frag #pragma multi_compile_fwdbase #include "Lighting.cginc" #include "AutoLight.cginc" fixed4 _Color; fixed4 _ReflectColor; fixed _ReflectAmount; samplerCUBE _Cubemap; struct a2v { float4 vertex : POSITION; float3 normal : NORMAL; }; struct v2f { float4 pos : SV_POSITION; float3 worldPos : TEXCOORD0; fixed3 worldNormal : TEXCOORD1; fixed3 worldViewDir : TEXCOORD2; fixed3 worldRefl : TEXCOORD3; SHADOW_COORDS(4 ) }; v2f vert (a2v v) { v2f o; o.pos = UnityObjectToClipPos(v.vertex); o.worldNormal = UnityObjectToWorldNormal(v.normal); o.worldPos = mul(unity_ObjectToWorld, v.vertex).xyz; o.worldViewDir = UnityWorldSpaceViewDir(o.worldPos); o.worldRefl = reflect (-o.worldViewDir, o.worldNormal); TRANSFER_SHADOW(o); return o; } fixed4 frag (v2f i) : SV_Target { fixed3 worldNormal = normalize (i.worldNormal); fixed3 worldLightDir = normalize (UnityWorldSpaceLightDir(i.worldPos)); fixed3 worldViewDir = normalize (i.worldViewDir); fixed3 ambient = UNITY_LIGHTMODEL_AMBIENT.xyz; fixed3 diffuse = _LightColor0.rgb * _Color.rgb * max (0 , dot (worldNormal, worldLightDir)); fixed3 reflection = texCUBE(_Cubemap, i.worldRefl).rgb * _ReflectColor.rgb; UNITY_LIGHT_ATTENUATION(atten, i ,i.worldPos); fixed3 color = ambient + lerp(diffuse, reflection, _ReflectAmount)* atten; return fixed4(color, 1.0 ); } ENDCG } } Fallback "Reflective/VertexLit" }
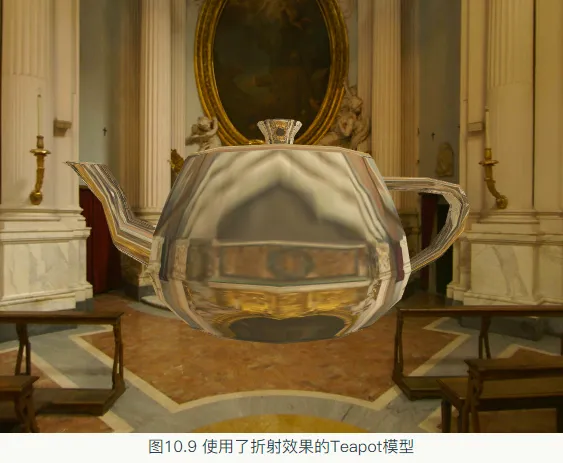
折射
我们可以使用斯涅耳定律来计算反射角。
η 1 sin ( θ 1 ) = η 2 sin ( θ 2 ) \eta_1\sin\left(\theta_1\right)\;=\;\eta_2\sin\left(\theta_2\right)
η 1 sin ( θ 1 ) = η 2 sin ( θ 2 )
1 2 3 4 5 6 7 8 9 10 11 12 13 14 15 16 17 18 19 20 21 22 23 24 25 26 27 28 29 30 31 32 33 34 35 36 37 38 39 40 41 42 43 44 45 46 47 48 49 50 51 52 53 54 55 56 57 58 59 60 61 62 63 64 65 66 67 68 69 70 71 72 73 74 75 76 77 78 79 80 81 82 83 84 85 86 87 88 89 90 91 92 93 94 95 96 97 98 99 100 Shader "Unity Shaders Book/Chapter 10 /Refraction" { Properties { _Color ("Color Tint", Color) = (1 , 1 , 1 , 1 ) _RefractColor ("Refraction Color", Color) = (1 , 1 , 1 , 1 ) _RefractAmount ("Refraction Amount", Range(0 , 1 )) = 1 _RefractRatio ("Refraction Ratio", Range(0.1 , 1 )) = 0.5 _Cubemap ("Refraction Cubemap", Cube) = "_Skybox" {} } SubShader { Tags { "RenderType"="Opaque" "Queue"="Geometry"} Pass { Tags { "LightMode"="ForwardBase" } CGPROGRAM #pragma multi_compile_fwdbase #pragma vertex vert #pragma fragment frag #include "Lighting.cginc" #include "AutoLight.cginc" fixed4 _Color; fixed4 _RefractColor; float _RefractAmount; fixed _RefractRatio; samplerCUBE _Cubemap; struct a2v { float4 vertex : POSITION; float3 normal : NORMAL; }; struct v2f { float4 pos : SV_POSITION; float3 worldPos : TEXCOORD0; fixed3 worldNormal : TEXCOORD1; fixed3 worldViewDir : TEXCOORD2; fixed3 worldRefr : TEXCOORD3; SHADOW_COORDS(4 ) }; v2f vert(a2v v) { v2f o; o.pos = UnityObjectToClipPos(v.vertex); o.worldNormal = UnityObjectToWorldNormal(v.normal); o.worldPos = mul(unity_ObjectToWorld, v.vertex).xyz; o.worldViewDir = UnityWorldSpaceViewDir(o.worldPos); o.worldRefr = refract (-normalize (o.worldViewDir), normalize (o.worldNormal), _RefractRatio); TRANSFER_SHADOW(o); return o; } fixed4 frag(v2f i) : SV_Target { fixed3 worldNormal = normalize (i.worldNormal); fixed3 worldLightDir = normalize (UnityWorldSpaceLightDir(i.worldPos)); fixed3 worldViewDir = normalize (i.worldViewDir); fixed3 ambient = UNITY_LIGHTMODEL_AMBIENT.xyz; fixed3 diffuse = _LightColor0.rgb * _Color.rgb * max (0 , dot (worldNormal, worldLightDir)); fixed3 refraction = texCUBE(_Cubemap, i.worldRefr).rgb * _RefractColor.rgb; UNITY_LIGHT_ATTENUATION(atten, i, i.worldPos); fixed3 color = ambient + lerp(diffuse, refraction, _RefractAmount) * atten; return fixed4(color, 1.0 ); } ENDCG } } FallBack "Reflective/VertexLit" }
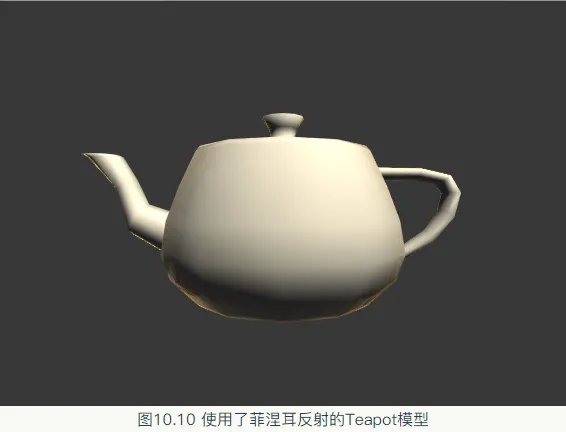
菲涅尔反射
菲涅尔反射描述了一种光学现象,即当光线照射到物体表面时,一部分发生反射,一部分进入物体内部,发生散射或者折射。Schlick菲涅尔近似等式:
F s c h l i c k ( v , n ) = F 0 + ( 1 − F 0 ) ( 1 − v ⋅ n ) 5 F_{schlick}(v,n)\;=\;F_0\;+\;(1\;-\;F_0){(1\;-\;v\cdot n)}^5
F sc h l i c k ( v , n ) = F 0 + ( 1 − F 0 ) ( 1 − v ⋅ n ) 5
Empricial菲涅尔近似等式:
F E m p r i c i a l ( v , n ) = m a x ( 0 , m i n ( 1 , b i a s + s c a l e × ( 1 − v ⋅ n ) p o w e r ) ) F_{Empricial}(v,n)\;=\;max(0,min(1,bias+scale\times{(1-v\cdot n)}^{power}))
F E m p r i c ia l ( v , n ) = ma x ( 0 , min ( 1 , bia s + sc a l e × ( 1 − v ⋅ n ) p o w er ))
使用Schlick菲涅尔近似等式:
1 2 3 4 5 6 7 8 9 10 11 12 13 14 15 16 17 18 19 20 21 22 23 24 25 26 27 28 29 30 31 32 33 34 35 36 37 38 39 40 41 42 43 44 45 46 47 48 49 50 51 52 53 54 55 56 57 58 59 60 61 62 63 64 65 66 67 68 69 70 71 72 73 74 75 76 77 78 79 80 81 82 83 84 85 86 87 88 89 90 91 92 93 94 95 Shader "Unity Shaders Book/Chapter 10 /Fresnel" { Properties { _Color ("Color Tint", Color) = (1 , 1 , 1 , 1 ) _FresnelScale ("Fresnel Scale", Range(0 , 1 )) = 0.5 _Cubemap ("Reflection Cubemap", Cube) = "_Skybox" {} } SubShader { Tags { "RenderType"="Opaque" "Queue"="Geometry"} Pass { Tags { "LightMode"="ForwardBase" } CGPROGRAM #pragma multi_compile_fwdbase #pragma vertex vert #pragma fragment frag #include "Lighting.cginc" #include "AutoLight.cginc" fixed4 _Color; fixed _FresnelScale; samplerCUBE _Cubemap; struct a2v { float4 vertex : POSITION; float3 normal : NORMAL; }; struct v2f { float4 pos : SV_POSITION; float3 worldPos : TEXCOORD0; fixed3 worldNormal : TEXCOORD1; fixed3 worldViewDir : TEXCOORD2; fixed3 worldRefl : TEXCOORD3; SHADOW_COORDS(4 ) }; v2f vert(a2v v) { v2f o; o.pos = UnityObjectToClipPos(v.vertex); o.worldNormal = UnityObjectToWorldNormal(v.normal); o.worldPos = mul(unity_ObjectToWorld, v.vertex).xyz; o.worldViewDir = UnityWorldSpaceViewDir(o.worldPos); o.worldRefl = reflect (-o.worldViewDir, o.worldNormal); TRANSFER_SHADOW(o); return o; } fixed4 frag(v2f i) : SV_Target { fixed3 worldNormal = normalize (i.worldNormal); fixed3 worldLightDir = normalize (UnityWorldSpaceLightDir(i.worldPos)); fixed3 worldViewDir = normalize (i.worldViewDir); fixed3 ambient = UNITY_LIGHTMODEL_AMBIENT.xyz; UNITY_LIGHT_ATTENUATION(atten, i, i.worldPos); fixed3 reflection = texCUBE(_Cubemap, i.worldRefl).rgb; fixed fresnel = _FresnelScale + (1 - _FresnelScale) * pow (1 - dot (worldViewDir, worldNormal), 5 ); fixed3 diffuse = _LightColor0.rgb * _Color.rgb * max (0 , dot (worldNormal, worldLightDir)); fixed3 color = ambient + lerp(diffuse, reflection, saturate(fresnel)) * atten; return fixed4(color, 1.0 ); } ENDCG } } FallBack "Reflective/VertexLit" }
渲染纹理
一个摄像机的渲染结果会输出到颜色缓冲中,并显示到我们的屏幕上。中间缓冲中,即渲染目标纹理(Render Target Texture,RTT),而不是传统的帧缓冲或后备缓冲(back buffer)。与之相关的是多重渲染目标纹理(Multiple Render Target,MRT)这种技术指的是GPU允许我们把场景同时渲染到多个渲染目标纹理中,而不再需要为每个渲染目标纹理单独渲染完整的场景。
直接创建一个渲染纹理,然后把某个摄像机的渲染目标设置成该渲染纹理。
在屏幕后处理时使用GrabPass命令或OnRenderImage函数来获取当前屏幕图像,Unity会把这个屏幕图像放到一张和屏幕分辨率等同的渲染纹理中,下面我们可以在自定义Pass中把他们当成普通的纹理来处理,从而实现各种屏幕特效。
镜子效果
创建一个shader,用于左右反转uv,创建一个Render Texture,用以接收摄像机传来的纹理,额外创建一个摄像机,用以向Render Texture传递纹理。
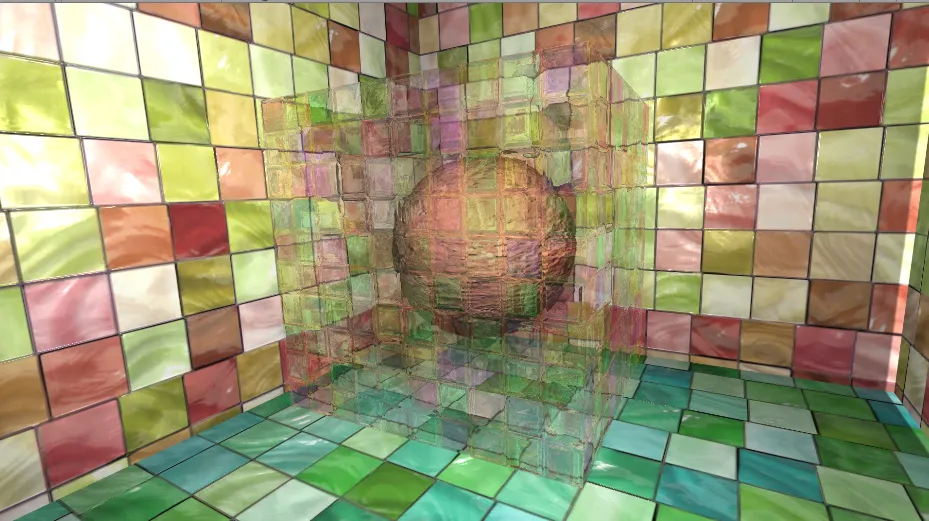
玻璃效果
在Shader中定义一个GrabPass后,Unity会把当前屏幕的图像绘制在一张纹理中,以便我们在后续的Pass中继续访问它。物体的渲染队列设置。GrabPass通常用于渲染透明物体,尽管代码里并不包含混合指令,但我们往往仍然需要把物体的渲染队列设置成透明队列(“Queue” = “Transparent”)。这样才可以保证当渲染该物体时,所有不透明物体都已经被绘制到屏幕上。
1 2 3 4 5 6 7 8 9 10 11 12 13 14 15 16 17 18 19 20 21 22 23 24 25 26 27 28 29 30 31 32 33 34 35 36 37 38 39 40 41 42 43 44 45 46 47 48 49 50 51 52 53 54 55 56 57 58 59 60 61 62 63 64 65 66 67 68 69 70 71 72 73 74 75 76 77 78 79 80 81 82 83 84 85 86 87 88 89 90 91 92 93 94 95 96 97 98 99 100 101 102 103 104 105 106 107 108 109 110 111 112 113 114 115 116 117 118 119 120 121 122 123 124 125 126 127 128 129 130 131 132 Shader "Unity Shaders Book/Chapter 10 /Glass Refraction" { Properties { _MainTex ("Main Tex", 2 D) = "white" {} _BumpMap ("Normal Map", 2 D) = "bump" {} _Cubemap ("Environment Cubemap", Cube) = "_Skybox" {} _Distortion ("Distortion", Range(0 , 100 )) = 10 _RefractAmount ("Refract Amount", Range(0.0 , 1.0 )) = 1.0 } SubShader { Tags { "Queue"="Transparent" "RenderType"="Opaque" } GrabPass { "_RefractionTex" } Pass { CGPROGRAM #pragma vertex vert #pragma fragment frag #include "UnityCG.cginc" sampler2D _MainTex; float4 _MainTex_ST; sampler2D _BumpMap; float4 _BumpMap_ST; samplerCUBE _Cubemap; float _Distortion; fixed _RefractAmount; sampler2D _RefractionTex; float4 _RefractionTex_TexelSize; struct a2v { float4 vertex : POSITION; float3 normal : NORMAL; float4 tangent : TANGENT; float2 texcoord: TEXCOORD0; }; struct v2f { float4 pos : SV_POSITION; float4 scrPos : TEXCOORD0; float4 uv : TEXCOORD1; float4 TtoW0 : TEXCOORD2; float4 TtoW1 : TEXCOORD3; float4 TtoW2 : TEXCOORD4; }; v2f vert (a2v v) { v2f o; o.pos = UnityObjectToClipPos(v.vertex); o.scrPos = ComputeGrabScreenPos(o.pos); o.uv.xy = TRANSFORM_TEX(v.texcoord, _MainTex); o.uv.zw = TRANSFORM_TEX(v.texcoord, _BumpMap); float3 worldPos = mul(unity_ObjectToWorld, v.vertex).xyz; fixed3 worldNormal = UnityObjectToWorldNormal(v.normal); fixed3 worldTangent = UnityObjectToWorldDir(v.tangent.xyz); fixed3 worldBinormal = cross (worldNormal, worldTangent) * v.tangent.w; o.TtoW0 = float4(worldTangent.x, worldBinormal.x, worldNormal.x, worldPos.x); o.TtoW1 = float4(worldTangent.y, worldBinormal.y, worldNormal.y, worldPos.y); o.TtoW2 = float4(worldTangent.z, worldBinormal.z, worldNormal.z, worldPos.z); return o; } fixed4 frag (v2f i) : SV_Target { float3 worldPos = float3(i.TtoW0.w, i.TtoW1.w, i.TtoW2.w); fixed3 worldViewDir = normalize (UnityWorldSpaceViewDir(worldPos)); fixed3 bump = UnpackNormal(tex2D(_BumpMap, i.uv.zw)); float2 offset = bump.xy * _Distortion * _RefractionTex_TexelSize.xy; i.scrPos.xy = offset * i.scrPos.z + i.scrPos.xy; fixed3 refrCol = tex2D(_RefractionTex, i.scrPos.xy/i.scrPos.w).rgb; bump = normalize (half3(dot (i.TtoW0.xyz, bump), dot (i.TtoW1.xyz, bump), dot (i.TtoW2.xyz, bump))); fixed3 reflDir = reflect (-worldViewDir, bump); fixed4 texColor = tex2D(_MainTex, i.uv.xy); fixed3 reflCol = texCUBE(_Cubemap, reflDir).rgb * texColor.rgb; fixed3 finalColor = reflCol * (1 - _RefractAmount) + refrCol * _RefractAmount; return fixed4(finalColor, 1 ); } ENDCG } } FallBack "Diffuse" }
直接使用GrabPass{},然后在后续的Pass中直接使用_GrabTexture来访问屏幕图像。但是如果场景中多个物体都使用这个形式,会造成较大性能消耗。因为对于每一个使用它的物体,Unity都会为它单独进行一次昂贵的屏幕抓取操作。
使用GrabPass{“TextureName”},可以在后续的Pass中使用TextureName来访问屏幕图像。Unity只会在每一帧时为第一个使用名为TextureName的纹理的物体进行一次抓取屏幕,同样可以在其他Pass中被访问。即所有使用该命令的物体都是同样的屏幕图像。
渲染纹理对比GrabPass
从效率上来说,渲染纹理效率往往要好于GrabPass,使用渲染纹理我们可以自定义渲染纹理的大小。而使用GrabPass获取到的屏幕分辨率和显示屏幕是一致的,这意味着在一些高分辨率设备上可能会造成严重的带宽影响。需要CPU直接读取后备缓冲(back buffer),破坏了CPU和GPU并行性,这往往是比较耗时的。一些移动设备不支持。命令缓冲(Command Buffers)来允许我们拓展Unity的渲染流水线。
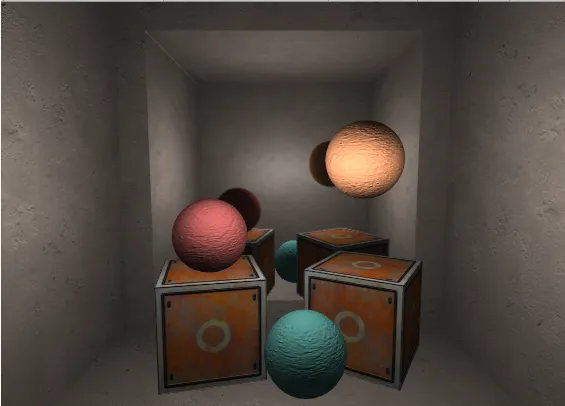
程序纹理
程序纹理是指那些由计算机生成的图像,我们通常使用一些特定的算法来创建个性化团或非常真实的自然元素,例如木头,石子。
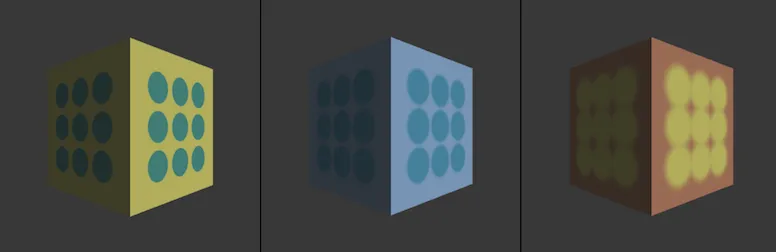
在Unity中实现简单的程序纹理
1
2
3
4
5
6
7
8
9
10
11
12
13
14
15
16
17
18
19
20
21
22
23
24
25
26
27
28
29
30
31
32
33
34
35
36
37
38
39
40
41
42
43
44
45
46
47
48
49
50
51
52
53
54
55
56
57
58
59
60
61
62
63
64
65
66
67
68
69
70
71
72
73
74
75
76
77
78
79
80
81
82
83
84
85
86
87
88
89
90
91
92
93
94
95
96
97
98
99
100
101
102
103
104
105
106
107
108
109
110
111
112
113
114
115
116
117
118
119
120
121
122
123
124
125
126
127
128
129
130
131
132
133
134
135
136
137
138
139
140
141
142
143
144
145
146
147
148
149
150
151
152
153
154
155
156
157
158
159
160
161
162
163
164
165
166
167
168
using UnityEngine;using System.Collections;using System.Collections.Generic;[ExecuteInEditMode ] public class ProceduralTextureGeneration : MonoBehaviour { public Material material = null ; #region Material properties [SerializeField, SetProperty("textureWidth" ) ] private int m_textureWidth = 512 ; public int textureWidth { get { return m_textureWidth; } set { m_textureWidth = value ; _UpdateMaterial(); } } [SerializeField, SetProperty("backgroundColor" ) ] private Color m_backgroundColor = Color.white; public Color backgroundColor { get { return m_backgroundColor; } set { m_backgroundColor = value ; _UpdateMaterial(); } } [SerializeField, SetProperty("circleColor" ) ] private Color m_circleColor = Color.yellow; public Color circleColor { get { return m_circleColor; } set { m_circleColor = value ; _UpdateMaterial(); } } [SerializeField, SetProperty("blurFactor" ) ] private float m_blurFactor = 2.0f ; public float blurFactor { get { return m_blurFactor; } set { m_blurFactor = value ; _UpdateMaterial(); } } #endregion private Texture2D m_generatedTexture = null ; void Start () { if (material == null ) { Renderer renderer = gameObject.GetComponent<Renderer>(); if (renderer == null ) { Debug.LogWarning("Cannot find a renderer." ); return ; } material = renderer.sharedMaterial; } _UpdateMaterial(); } private void _UpdateMaterial() { if (material != null ) { m_generatedTexture = _GenerateProceduralTexture(); material.SetTexture("_MainTex" , m_generatedTexture); } } private Color _MixColor(Color color0, Color color1, float mixFactor) { Color mixColor = Color.white; mixColor.r = Mathf.Lerp(color0.r, color1.r, mixFactor); mixColor.g = Mathf.Lerp(color0.g, color1.g, mixFactor); mixColor.b = Mathf.Lerp(color0.b, color1.b, mixFactor); mixColor.a = Mathf.Lerp(color0.a, color1.a, mixFactor); return mixColor; } private Texture2D _GenerateProceduralTexture() { Texture2D proceduralTexture = new Texture2D(textureWidth, textureWidth); float circleInterval = textureWidth / 4.0f ; float radius = textureWidth / 10.0f ; float edgeBlur = 1.0f / blurFactor; for (int w = 0 ; w < textureWidth; w++) { for (int h = 0 ; h < textureWidth; h++) { Color pixel = backgroundColor; for (int i = 0 ; i < 3 ; i++) { for (int j = 0 ; j < 3 ; j++) { Vector2 circleCenter = new Vector2(circleInterval * (i + 1 ), circleInterval * (j + 1 )); float dist = Vector2.Distance(new Vector2(w, h), circleCenter) - radius; Color color = _MixColor(circleColor, new Color(pixel.r, pixel.g, pixel.b, 0.0f ), Mathf.SmoothStep(0f , 1.0f , dist * edgeBlur)); pixel = _MixColor(pixel, color, color.a); } } proceduralTexture.SetPixel(w, h, pixel); } } proceduralTexture.Apply(); return proceduralTexture; } }
Unity的程序材质
使用Substance Sesigner制作。

 微信
微信 支付宝
支付宝