构建recastnavigation并部署服务端到Linux
前言
这几天有群友Mac运行不了Moba项目,是因为recastnavigation我编译的是Windows专用的动态dll库,用Mac就得编译一个dylib,好在最后解决了
正好前阵子换了博客系统,之前买的服务器空闲下来了,那我索性再去Linux编一个so的吧,正好把项目架设到服务器上,自娱自乐一下。
本文提及Linux专用的premake5.lua和用于p/invoke的文件链接:https://gitee.com/NKG_admin/NKGMobaBasedOnET/tree/master/RecastNavMesh/Core/Linux-RecastNavDll
文章部分内容参照 @footman 大佬的doc文档
环境
CentOS 7.6(注意,因为在写本篇文章过程中我进行了多次试验,重置了很多次系统,所以下面的一些截图可能环境于此处不一致,以此处为准)
服务器配置
先去阿里云服务器控制台把需要的端口开了
安全-防火墙-添加规则
只添加这两个规则就够了,一个用于FTP操作文件(我们FinalShell就是连接的这个端口),一个作为游戏服务器端口

客户终端配置
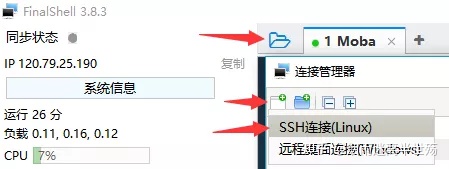
使用FinalShell,集FTP文件服务和命令行终端为一体
服务端环境配置
安装MongoDB数据库
https://docs.mongodb.com/manual/tutorial/install-mongodb-on-red-hat/
安装.net Core环境
https://www.cnblogs.com/stulzq/p/7742066.html
因为我的项目是.net core 3.1,所以
1 | sudo yum install dotnet-sdk-3.1 |
构建适用于Linux的寻路so文件
导入recastnavigation
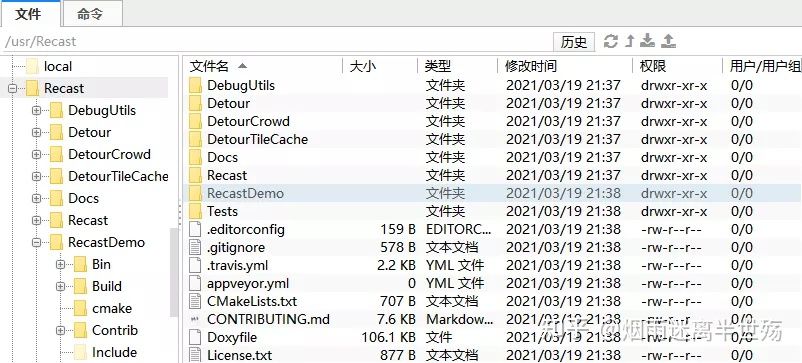
下载原库,通过FinalShell上传到Linux服务器,https://github.com/recastnavigation/recastnavigation
我们这里上传到/usr/Recast目录下
安装premake5
由于recastnavigation本身使用premake5生成对应平台解决方案,所以要安装linux下的premake5,但是yum install premake5会报这个错误
1 | yum install premake5 |
所以我们需要自行下载安装:https://premake.github.io/download.html ,注意要下载Linux版本的(比如我们这里下载的包是premake-5.0.0-alpha15-linux.tar.gz)
然后通过FinalShell将其上传到Linux的/bin/目录下
然后通过以下命令进行安装
1 | tar zxvf premake-5.0.0-alpha15-linux.tar.gz |
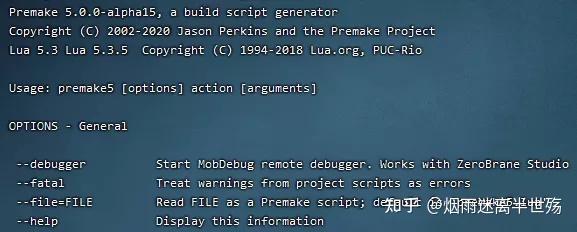
安装完成后输入premake5 --help,出现以下字样即为安装成功
安装SDL2
1 | yum install SDL2_gfx-devel.x86_64 |
安装G++编译器
1 | yum install gcc-c++ libstdc++-devel |
安装Opengl
1 | yum install mesa* |
修复编译错误
首先是部分库头文件缺失引用,在premake5.lua中指定位置添加

会有很多类似下图的错误
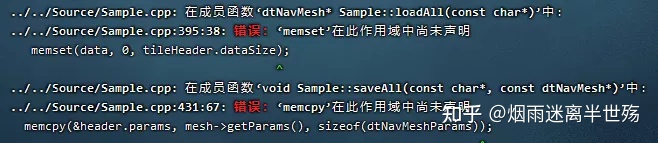
我们需要在Sample.cpp,SampleInterfaces.cpp,main.cpp添加
1 |
因为Linux的memset()和memcpy()都被包含在string.h里
阶段性验证
目前为止我们对于recastnavigation原库在Linux上的编译应该是没问题的
来验证一下,先来到/usr/Recast/RecastDemo目录,进行makefile生成
1 | cd /usr/Recast/RecastDemo |
然后来到生成的Build目录进行make构建
1 | cd /usr/Recast/RecastDemo/Build |
以上这些步骤做完是不应该有问题的
用于p/Invoke的so文件构建
PS:这部分我做了两次,因为我第一次的时候把premake.lua中导出名称写成RecastDll了,后面改正为RecastNavDll,所以一些报错图中名称可能对不上(但是具体报错是能对上的),具体内容我已更正,其实没必要太在意,只是提一嘴
首先把需要的桥接代码上传,因为Linux中gcc的一些实现和msvc不一样,所以需要改一些代码来适配,修改后的代码我会放在码云上,链接:https://gitee.com/NKG_admin/NKGMobaBasedOnET/tree/master/RecastNavMesh/Core/Linux-RecastNavDll
创建于RecastDemo同级文件夹,并将代码文件放入

然后修改premake5.lua,加入RecastDll工程,注意我们用到了C++ 11的特性,所以在编译选项要加上"-std=c++11"
1 | project "RecastNavDll" |
然后修改DLLEXPORT宏,__declspec(dllexport)只有Windows才需要,所以我们这里加一个平台判断
1 |
然后我们在Link的时候会报错

所以需要修改一下Detour的premake脚本
1 | project "Detour" |
最后我们需要在/usr/Recast/RecastDemo/Build/gmake目录执行一次clean操作
1 | make clean |
然后再重新构建一次项目,大功告成(如果你按照上面步骤来的,红框里的应该是libRecastNavDll.so)

发布Release版本
当然了,上面我们是发布的Debug版本的so,当我们调试完成没问题后我们应该编译出一个更优的Release版本,但是recastnavigation官方提供的premake.lua文件默认会把调试用的符号表写入Release,这是为了我们同样可以调试Release版本,但是我们这里不需要了,修改如下
1 | solution "recastnavigation" |
最后我们使用如下命令重新构建一次Release版本的动态库
1 | cd /usr/Recast/RecastDemo |

PS:其实我刚开始没注意它的premake.lua文件,打出来的Release包比Debug版本还要大200多kb,达到了600多kb,去网上找了一下有说是内联导致的,我表示疑惑,这也内的太联了吧,应该不是这个问题,最后在premake5的wiki找到了答案:https://github.com/premake/premake-core/wiki/Your-First-Script
附上C++ Release详细讲解:https://www.codeproject.com/Articles/548/Surviving-the-Release-Version
发布ET服务端代码
先把上面构建好的so放到指定目录,然后编辑Recast的csproj进行拷贝(这些操作和之前那篇接入recastnavigation到windows一样:https://www.lfzxb.top/cpp-recastnavigation-to-unity-or-server/ )

1 | <ItemGroup> |
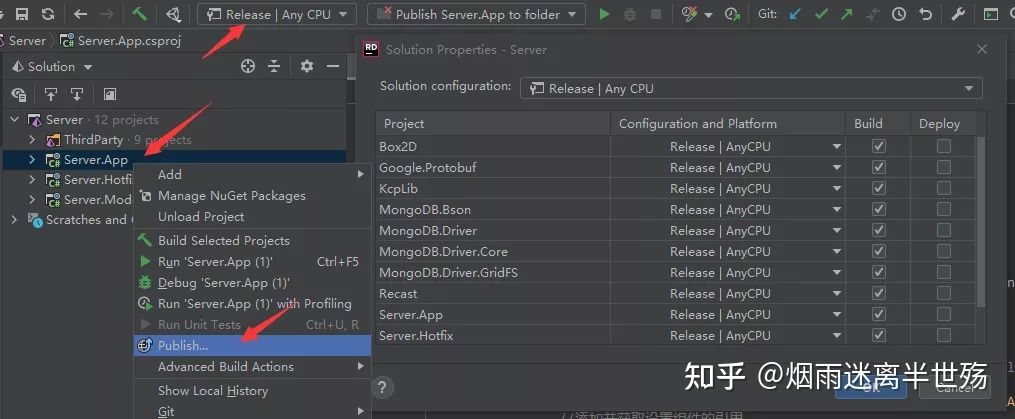
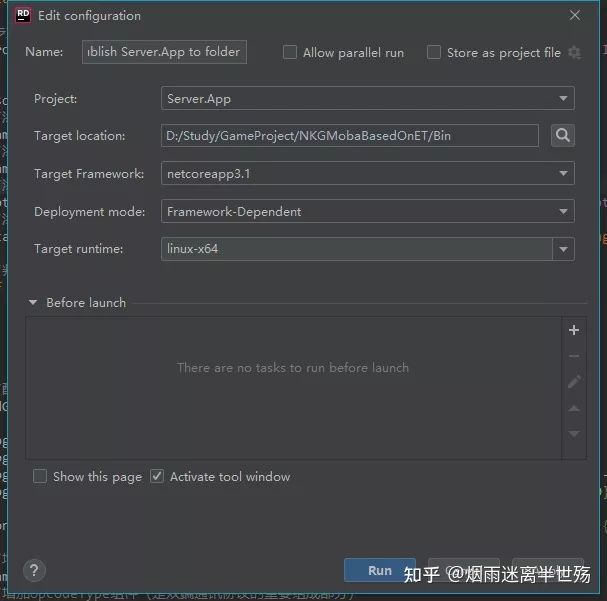
然后直接使用Rider的Pubish功能进行发布即可,注意要把构建方案改为Release版本的,然后选择Server.App进行Publish
导出目录随便选
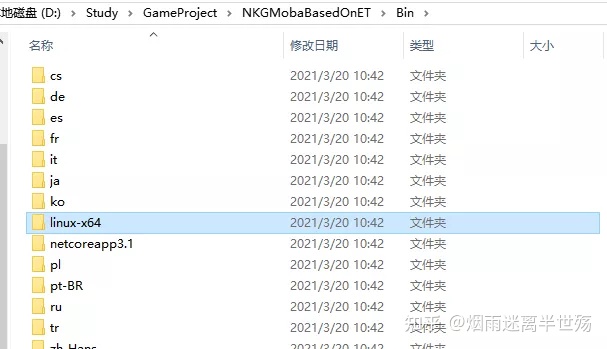
然后我们将导出目录中的linux-x64文件夹通过FinalShell上传到Linux服务器的/root/Server目录
最还需要将本地项目根目录的Configs文件夹,Logs文件夹上传至Linux的Server目录

最后效果如下:

PS:VS版本的发布操作参见 https://docs.microsoft.com/en-us/dotnet/core/tutorials/publishing-with-visual-studio
最终配置
上面我们只是可以跑通ET服务端,但是因为配置问题,我们客户端是连接不上服务器的,所以我们最后要配置一下网址和端口相关内容
客户端
配置客户端要连接的服务器地址
服务端
参见:https://www.lfzxb.top/et-cloud-ecs/
启动服务器
创建shell脚本
在/root/目录创建并编写sh脚本,用于一行命令启动游戏进程
1 | vim StartServer.sh |
将其放在/root/目录下,sh文件内容为
1 | !bin/sh |
最后我们调用
1 | sh StartServer.sh |

Linux相关知识(坑)
wget下载文件
使用Wget下载文件
下面的示例将从服务器下载文件到当前本地目录。
1 | wget https://tecadmin.net/file.zip |
下载文件并保存到特定位置
下面的命令将下载名为file.zip的/ opt文件夹中的zip文件。-O用于指定目标文件夹
1 | wget https://tecadmin.net/file.zip -O /opt/file.zip |
MongoDB报错Failed to start mongod.service: Unit not found
https://blog.csdn.net/weixin_39198406/article/details/83656943
还不行就重置系统,解千愁
进入/退出Vim编辑器
https://jingyan.baidu.com/article/414eccf681e6706b431f0a94.html
 微信
微信 支付宝
支付宝